3.0 KiB
Tutorial 6 - Active high
Pull-up resistors
There are many sources that explain "pull-up resistors", so I won't repeat it here. Here is a good tutorial on Pull-up Resistors.
Active low
Most the keyboards up to this point in the tutorial series have used active low with internal pull-up resistors.
"Active low" means that if a switch is pressed (active state), the read pin is low. When the switch is released (inactive state), the pull-up resistor pulls the read pin high.
Arduino boards have internal pull-up resistors, which saves on parts and labor compared to manually adding external pull resistors.
To make a key matrix active low:
- Orient diodes with cathode (banded end) towards the strobe pins (row)
- Instantiate the scanner in the sketch with activeState LOW, like this:
Scanner_uC scanner(LOW, readPins, readPinCount);
Active high
"Active high" means that if a switch is pressed (active), the read pin is high. When the switch is released (inactive), the pull-down resistor pulls the read pin low.
Arduino boards do not have internal pull-down resistors. If you want to use active low, you will have to add external pull-down resistors to the read pins.
To make a key matrix active high:
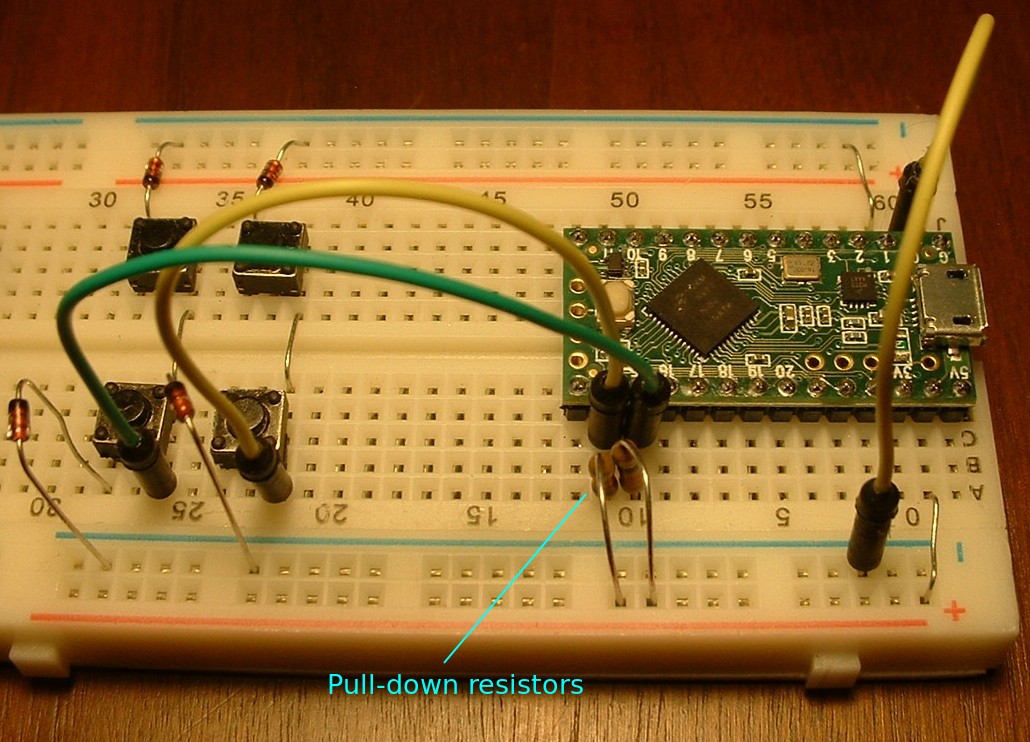
- Add an external 10k Ohm pull-down resistor to each read pin
- Orient diodes with cathode (banded end) towards the read pins
- Instantiate the scanner in the sketch with activeState HIGH, like this:
Scanner_uC scanner(HIGH, readPins, readPinCount);
Making a breadboard keyboard active-high
Make the following changes to the basic breadboard keyboard described in tutorial_1_breadboard_keyboard.md:
- Add an external 10k Ohm pull-down resistor (red bus) to each read pin
- Orient diodes with cathode (banded end) towards the read pins
keybrd sketch with active-high
The keybrd_6_active_high.ino sketch will run on the above breadboard keyboard.

keybrd tutorial by Wolfram Volpi is licensed under a Creative Commons Attribution 4.0 International License.
Permissions beyond the scope of this license may be available at https://github.com/wolfv6/keybrd/issues/new.
